
University of Missouri Qualtrics Help Page
How to Create a Qualtrics Account
- Go to https://missouri.qualtrics.com.
- You will be taken to the University of Missouri’s single sign-on service. Sign in using your University pawprint and password.
- When the new page appears, click No, I don’t have a preexisting account here.
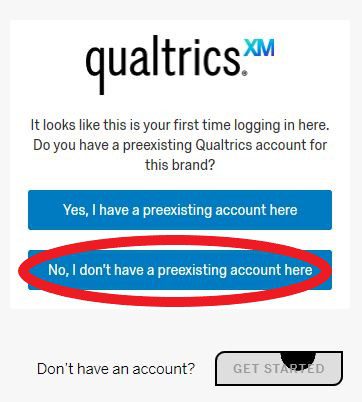
- The box should change to the below. Click Sign In.

- You should now be logged into Qualtrics. The Terms of Service will appear on the screen. Review the Terms of Service and then click I Accept in the lower right-hand corner. Your account is now created.
NOTE: Newly created accounts are part of the automatic free Qualtrics license and come with several restrictions. Some University of Missouri divisions/departments have purchased an upgraded license. Please contact arc@missouri.edu to see if your account should be moved to the appropriate division/departmental license. Make sure to include your division and department in your email.
What is the Qualtrics Organization ID?
The Qualtrics Organization ID for the University of Missouri is missouri.
How to Contact Qualtrics Support
- Go to https://www.qualtrics.com/support/.
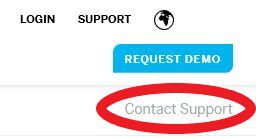
- In the upper right-hand corner, click Contact Support. It is in gray text and under the Request Demo button.
- You will be taken to the Qualtrics login page. Click Sign In with SSO.
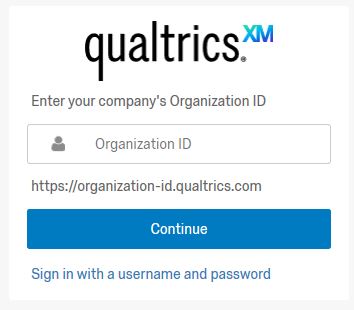
- On the next page, you will be prompted to enter the Organization ID for MU. Enter missouri in all lowercase letters. Click Continue.
- You will be taken to the University of Missouri’s single sign-on service. Sign in using your University pawprint and password.
- Once logged in, click I have a different support request. When the dropdown appears, select Survey Platform.
- You have three contact options – chat, email, and phone. Click your preferred method of contact.

How to Require Authentication through SSO
In some surveys, you may want to require respondents to log in using the university’s single sign-on (SSO) to take a survey or to capture information about them, such as name or email address.
NOTE: The “Preview Survey” and the “Look and Feel” function do not work with the Authenticator active. Make sure to do all survey testing before adding authentication. Also, make sure to test authentication and results before sending out the survey.
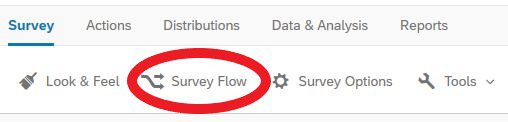
- From the Survey tab, click Survey Flow.
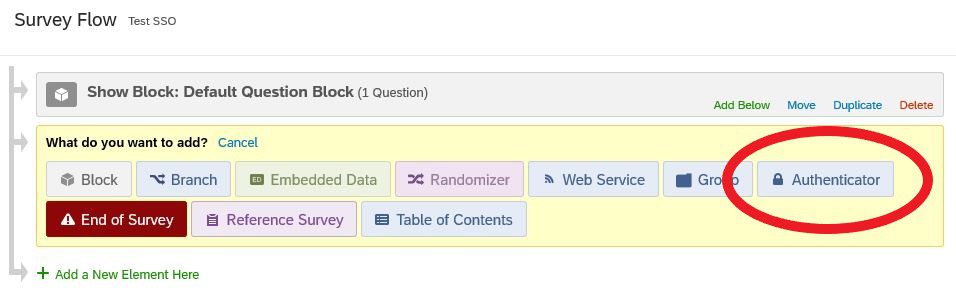
- On the Survey Flow page, click + Add a New Element Here.

- Click on Authenticator.
- Using the dropdown, change the Authentication Type to SSO.
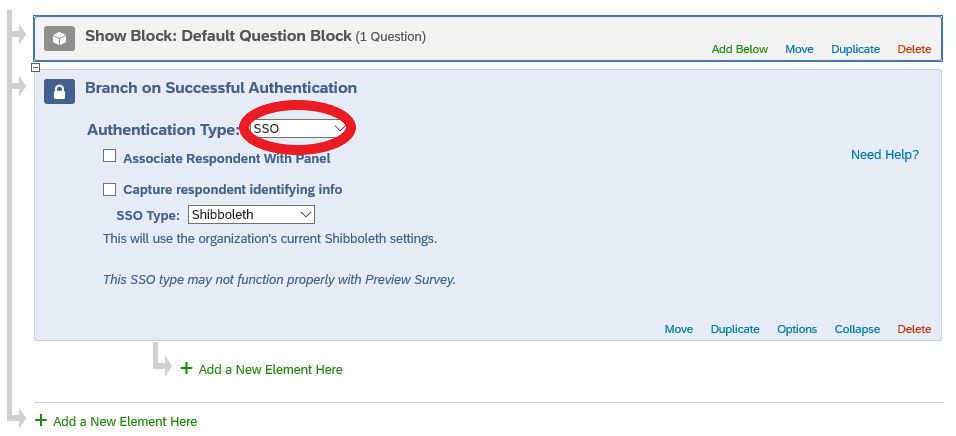
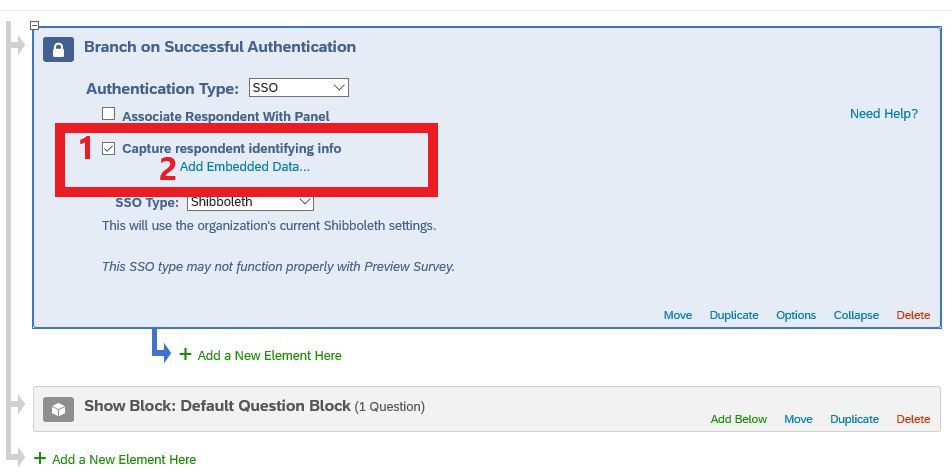
- Uncheck Associate Respondent with Panel.
- Under Capture respondent identifying info, use the dropdown to change SSO Type to Shibboleth.
- At the bottom of the Authentication block, click Move.
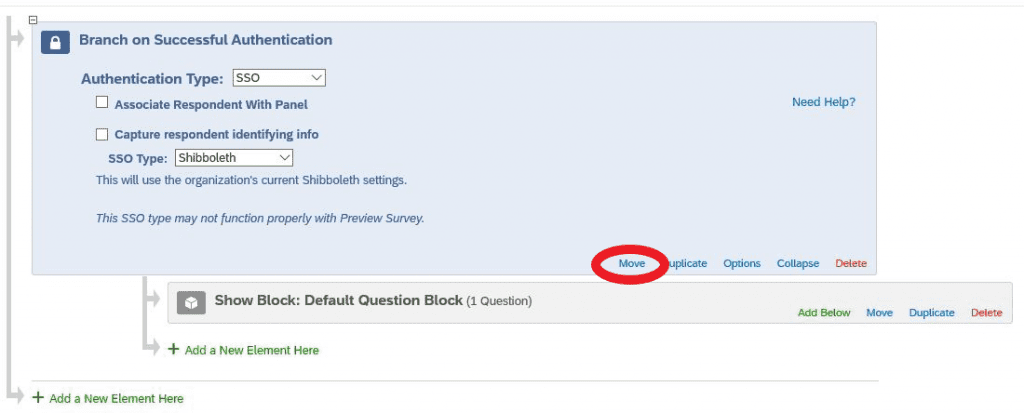
- Drag and drop so the Authentication block is the first item in the flow.
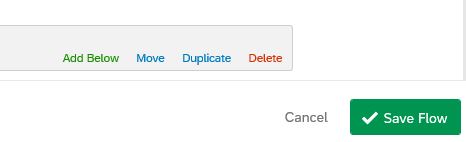
- Click Save Flow on the lower right.
How to Capture Identifying Information on Respondents using SSO
- Follow the directions for How to Require Authentication through SSO through Step 5.
- In the Authentication block, check Capture respondent identifying info and click Add Embedded Data.
- Type your Embedded Data field name (example: Email Address) into the Embedded Data to Set text entry box on the left of the equal (=) sign. Then, copy the corresponding character/number combination from Table 1 below and paste into the Field From SSO text entry box on the right of the equal (=) sign. NOTE: To capture more respondent identifying information, click the green plus sign to add another line. Then, repeat Step 3.
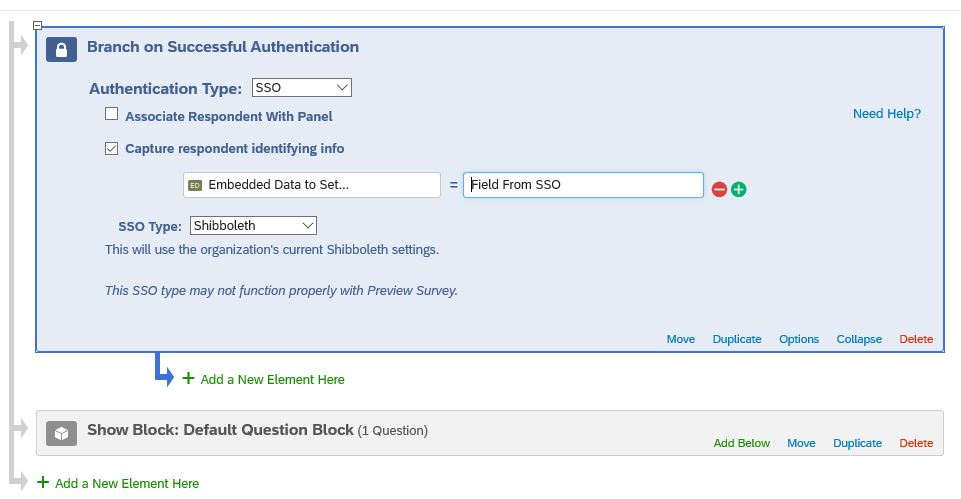
Table 1
The information in this table is for the Columbia campus and UM System offices only.
| Embedded Data to Set | Field From SSO |
|---|---|
| PawPrint | urn:mace:umsystem.edu:attribute-def:samAccountName |
| Affiliation (Faculty, Staff, Student, etc.) | urn:oid:1.3.6.1.4.1.5923.1.1.1.5 |
| Email Address | urn:oid:0.9.2342.19200300.100.1.3 |
| First Name | urn:oid:2.5.4.42 |
| Last Name | urn:oid:2.5.4.4 |
| Department | urn:mace:umsystem.edu:attribute-def:department |
- Click Save Flow on the lower right.
NOTE: You can test the survey using an anonymous link. If you are using the same browser to test the survey, you must first log out of Qualtrics by closing your browser. Alternatively, you may also use a different browser.